400TX

Unsolicited editorials on cameras, lenses, film, developer, and black and white photography in general.

My Photo
Name:
Location: New Orleans, Louisiana, United States

Monday, July 31, 2006

Domke Protective Wraps

With the post-9/11 heightened need for security at airports, I had all but given up on taking a camera with me on trips. Immediately post-9/11, I attempted to board a plane in Seattle with a Leica CL loaded with exposed slide film. I asked a paramilitary-looking lady to hand-inspect it (along with all of my exposed film) rather than x-raying it. Bad idea. Not only did they run the camera and film back and forth through the X-ray machine half a dozen times, I had to remove all of my clothes short of my slacks and dress shirt. Have you had your tie X-rayed? In short, what I endured was a “Let this be a lesson to you for asking us to compromise our security.” One roll of slides that was in my carry-on bag was X-rayed only once and was usable. All of the others were fogged and greenish. I rarely carry a film camera with me on a plane since then.

Tomorrow, I leave for San Diego and then to San Francisco to visit family. I do want to take a camera to get some pictures of the family. Instead of the easy answer, a digital camera, I’m taking an old Rolleiflex. With no metal cassettes covering the film, I can stash it in my pockets without setting off any metal detectors. I’m hoping to be able to carry it in my pockets on four legs of this trip. However, I am a bit concerned about my Rolleiflex being mauled by baggage guys. I don’t protect my Rolleis with a genuine leather Rolleiflex case. At $350 and by special order only, I’m not sure if anyone uses a genuine Rolleiflex leather case. But I do want to protect my 50-year-old 2.8F Planar.
I have found Domke protective wraps to be an effective way to protect cameras, lenses, meters, and anything else you want to give a bit of padding and resistance to scuffs. They remind me a little of very small versions of the pads used by movers to protect furniture. They are square with soft fabric outside and nylon inside. Each inside corner has Velcro™ on it, which sticks tenaciously to the soft fabric outside. Covering a camera or lens is a bit like diapering a baby (or making one of many different food items with a flour tortilla at Taco Bell™). One Domke Wrap didn’t seem like quite enough padding to me, so I double-wrapped the Rolleiflex with two.

Domke Protective Wraps come in 3 sizes (11”, 15”, or 19”, all square) and four colors. If you use collectible cameras and lenses that cannot easily be replaced, these lightweight wraps come in handy when taking treks, protecting your precious cargo from road dust, spilled soft drinks, cigarette smoke, and blinding sun.

Sunday, July 30, 2006

Afga APX 400 in Panthermic 777

Whenever I have wanted to shoot something dark, wet, and gritty, Agfa films and papers always came to mind. When I had a real darkroom for printing, I considered Agfa paper to be darkest, blackest, shiniest semi-matte paper available in town. I didn’t use it for faces as it seemed to make every pore on the nose stand out. Fred Picker often spoke disparagingly of chalk and soot prints. In my older years, I guess I have to agree with him that the effect is often not flattering. I shouldn't even have any Agfa films as they are discontinued and only a few places still have any. Before Hurricane Katrina, I got impulsive and bought about 300 rolls of APX 400 and APX 100, stored them in my office, and forgot about them in all of the turmoil. Six months after the hurricane, I returned to my office in the now moldy and rotting administration building and found four boxes that were falling apart. There stood the Agfa film I bought over a year ago and was storing at work. Too funky to sell on Ebay, so I might as well start using it.

I tested Agfa APX 400 with some PMK Pyro a few weeks ago. The results were awful unless you are looking for salt and pepper grain or wanted to document the appearance of workers shoveling coal into the boiler of a ship. PMK Pyro usually masks grain fairly well, but with Agfa 400 it met its match. Since my other favorite developer is Panthermic (or Harvey’s) 777, I decided to give it a try with Agfa 400. TRI-X and 777 work extremely well together, giving rich tonality under what I consider to be rather bland shooting conditions. I was hoping that Agfa 400 and 777 might produce something spectacular.

Panthermic 777 is one of the least-documented developers I have ever used. I didn’t have a starting time for Agfa 400, so I guessed at about 10 minutes at 75F. The density of the resulting negatives was good, so 10 minutes at room temperature is a good ballpark developing time. This was the first time I have used 777 without first pouring it through a Melitta coffee filter. I won’t try that again. The negatives were covered with small flecks of crud, presumably the junk that floats around in 777 in the bottle. I recommend always giving the solution a quick filtering.

After scanning the negatives, I will have to admit that they are grainier than I expected, nearly as grainy as Agfa 400 in PMK Pyro. In a match between TRI-X and Agfa 400 in 777, TRI-X wins. I will probably have the local B&W lab develop my Agfa 400 from now on. They can make just about anything look good with XTOL.


Wednesday, July 26, 2006

Fuji Neopan 400 in PMK Pyro

While the move from 35mm photography to digital photography has not lost any speed, the move away from medium format film photography seems to be accelerating. As I mentioned in a previous post, Contax, Pentax, Fuji, Mamiya, and Bronica have abandoned the medium format market, many years after Graflex, Kowa, Yashica, Minolta, and Koni Omega disappeared from the shelves. The demise of film cameras is naturally having an impact on the film manufacturers. I bought up 100 rolls of Verichrome pan when Kodak discontinued it. In retrospect, I should have accepted its fate and looked for a replacement. Not Agfa APX 100 (or 25, or 400), though, as Agfa film is now gone. And Ilford has been showing signs of sputtering out as well. Not to worry just yet, though. There are still film manufacturers in Europe that may be around a bit longer. And fortunately for me these films seem to do well in my two favorite developers (at least at the moment), Panthermic 777 and PMK Pyro. I can still make do quite well with Ilford FP4+ in Verichrome pan’s place, and Rollei 25 in Agfa APX 25’s place. TRI-X should be around a bit longer, based solely on its popularity. But are there other 400 ISO choices? The most promising one to me is Neopan 400.

I decided to try some Neopan 400 in PMK Pyro this week. PMK Pyro seems to work better with the older, more silver-rich films. But you can never predict results with pyro developers; sometimes it works beautifully with a 35mm film but doesn’t seem suited well at all for the 120 version of the same film. Fuji Neopan Acros 100 gave me very nice results with PMK Pyro, so it wasn’t a stretch to assume that the faster Neopan would give good results.

I shot a roll of Neopan 400 in medium format. I suppose I decided to give it every chance to succeed in the wake of having gotten pretty awful results with Agfa APX 400 in pyro. I developed it in the standard 1:2:100 dilution for 12 minutes at 68oF. That represents a good starting point for most films in PMK Pyro. The resulting negatives were thinner than I was expecting, giving me the impression that an E.I. of 200 might have been closer to the mark. The negatives were usable with some playing with curves, brightness, and contrast controls in Photoshop. Grain was very well suppressed.

This test shot in City Park responded well to the Photoshop tweaking, but I would rather have a negative that didn’t need so much tweaking. The first step would be to decrease the E.I. by a stop. Here’s the rub. I already get very nice results from Fomapan 200 Creative in PMK Pyro at the nominal 200 ISO, and Fomapan is cheaper. I don’t need another 200 film. So, this week, I’ll be trying Neopan 400 in 777. I think that will be a better match and may fill the 400 ISO film niche for me in medium format.

Photoshop can do some pretty amazing things with marginal negatives. Sometimes I worry that it will influence my technique. These negatives were marginal but salvagable. I can certainly do better.

Saturday, July 22, 2006

Renewing the look of your Vintage Rolleiflex

I don’t think of myself as a camera fondler although others may beg to differ. I prefer to think if it as taking care of my investment so it will last as long as I do, much like a Marine takes care of his M16. I have about 10 cameras that are at least 50 years old. When I get a vintage camera, I trust an expert technician to keep the insides running perfectly. For lenses, I use John Van Stelten at Focal Point. For Leicas, I use Don Goldberg at DAG or Ken Ruth at Bald Mountain . For Rolleiflexes, the man is Harry Fleenor at Oceanside Camera Repair. All of these master technicians are backlogged with work, and it isn’t unusual to have your camera in their care for months instead of weeks. For Leica repair, I have also heard very good reports about Sherry Krauter.

The exteriors of the cameras are a different matter. You can get your vintage rangefinder painted by a Japanese fellow named Shintaro. I try not to buy cameras or lenses classified as “Bargain” or “Ugly” (the very frank descriptors used by KEH Camera Brokers). Instead, I try to find a camera that looks just used enough to not appeal to collectors. I don’t care if it has its original box or lens cap. It just has to be functional and not obviously abused.

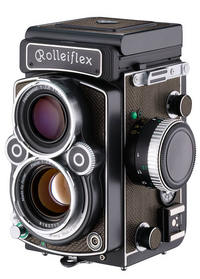
I have picked up four used Rolleiflexes over the past few years, the result of a lot of low-balling on Ebay and sometimes getting lucky. Twin lens reflexes have a lot more surface area on them than do rangefinders, and cleaning up their outsides is a bit more of a chore. I have to admit that I didn’t know the first thing about restoring the external leather of a Rolleiflex TLR, so I relied on the collective wisdom of the Rollei Users Group (or RUG), an international forum dedicated to Rolleiflex photography. When I posed the question of how to get the leather on the TLR looking new, I got a variety of answers and finally settled on two different leather care products.

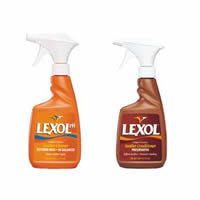
The first product suggested was a cleaner called Lexol. I had never seen the stuff in the store and it took some looking to locate a bottle of it (in Pep Boys, an automotive supplies store).

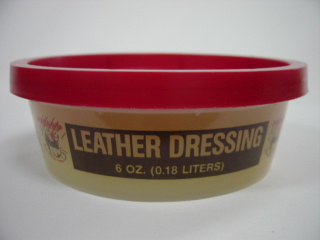
I wanted not only to clean the leather but also to restore it to its original black, gleaming state. One important consideration was to avoid all use of petroleum products as they are apparently a bit harsh on 50-year-old leather. I also wanted to avoid any sort of solvent that might unglue the thin leather from the metal. I lucked out. Jeff Kelley, one of the RUG members, recommended some leather treatment products designed for antique leather. The company, Pecard Leather Care, had a nice kit especially for antique leather at a reasonable price (with enough actual material for many Rolleiflexes). I ordered the kit, and it arrived in a few days ago. One of the kit's components is a large plastic tub of “leather dressing”, a greasy-feeling paste that looks like petroleum jelly but feels more like butch wax. Also in the kit are two flat tins of weatherproof dressing, one brown and one black. Perfect, in that my Rolleiflex FX 2.8 is brown and everything else I have is black. The tins look like shoe polish cans, but the stuff inside is much, much softer and somewhat translucent. I cannot think of a way to describe it other than “goop”. Not viscous enough to be slime, it is more like the lemon part of lemon meringue pie.

Using the Lexol and Pecard products can be a bit messy. I first cleaned the leather with cotton swabs dabbed in a 35mm film canister half-filled with Lexol. I bought the Lexol enriched with pH-balanced glycerol. Glycerol is a thick alcohol that very hydroscopic, i.e., it attracts water from the air. The Lexol is clear and a bit thick despite being in a spray bottle. I dabbed it on the leather with cotton swabs and let it set for about 10 minutes. I then removed it (and a lot of yellowish-brown grime) with cotton cosmetic pads.

The next step was the Pecard Leather Dressing. It is pretty hard to apply the greasy leather dressing to the camera without getting it all over the metal parts unless you decide to work in many small areas, one at a time. I chose to get it over with in a hurry and slathered a coating of the stuff all over the leather, getting it on the edges of the metal, my hands, and two terrycloth towels. The instructions suggest leaving it on for several days to let the dressing be absorbed. I didn’t want kid glove leather on the camera, so I let it set for an hour. Getting the leather dressing off of the camera was a little like competing in a greased pig contest. Eventually, I went over the entire camera with several clean terrycloth towels until nothing felt greasy (on the camera or me).

The following day, I applied the black weatherproof dressing. I was a bit less aggressive here, applying it slowly and methodically with cotton swabs. I let it sit for an hour, and then gently rubbed it off with clean terrycloth towels.

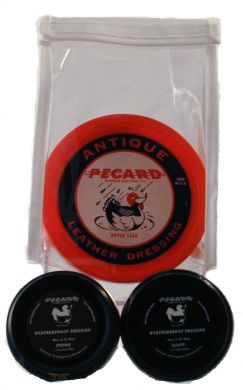
I have to say that the results were very nice, better than my old standard of Kiwi shoe polish. The luster left by the Pecard products is semi-glossy, leaving the leather with a very black matte appearance.

The Pecard Antique Leather Care Kit looks like just the right ticket to keeping your vintage Rolleiflex or Rolleicord looking new. That it comes with both brown and black leather weatherproof dressing is fortuitous. You can protect the leather on black and brown cameras as well as the brown cases and straps. The kit costs a mere $15 and should be enough to last you for years.
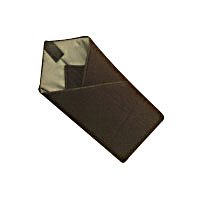
Friday, July 21, 2006

TRI-X in Panthermic 777

We all knew that there would be no surprises here. When the favorite developer of many past photojournalists used on the favorite film of most past photojournalists, would we expect bad results? Still, TRI-X has been reformulated in recent years, so why not shoot a test roll?

I shot this at the nominal ISO 400 under marginal lighting conditions (fluorescent lighting in a coffee shop at 7:00 A.M.). I souped in Panthermic 777 at 75oF. The results were nice grays and well-controlled grain. If the highlights in Glenda’s face are not sharp, I was shooting at f/2.0 and 1/60. The important thing is that this combination looks good, and I’m going to continue using it with TRI-X until something else looks better.

Wednesday, July 19, 2006

Getting Back Into TLR Photography

I have heard several film photographers say that they just can’t get used to digital, at least not without having to think a lot. I found the transition easy but unsatisfying. I simply put the digital in program mode and forgot about it. No fiddling with buttons or menus or histograms. My eyes don’t focus close enough to compose and adjust using an LCD screen. If you want to make an awkward transition, go from using a 35mm for 30 years to shooting with a twin lens reflex.

When I was 18, a TLR seemed much less difficult. I had just gotten into photography with a camera that wasn’t plastic, and I took to 35mm SLRs, 35mm rangefinders, and a medium format TLR with equal aplomb. But I eventually sold my Yashica D in 1972 and sold my Mamiya C330 in 1975. I did pick up a Yashica-Mat 124G when they were discontinued around 1980 but never used it much. In my youth, a new Honeywell Rolleiflex TLR cost about $400, roughly ten times as much as I spent on my Yashica D. I hungered for a Rolleiflex when I saw them in camera magazines but they were a wedding camera and I had no interest in weddings. Then came the Internet and E-Bay. You no longer had to rummage through pawn shops to find a good, cheap, used Rolleiflex. With my house paid off, I got hungry for a camera that I had lusted after 35 years ago but couldn’t afford. My first Rolleiflex was an E-Bay 3.5E Xenotar with fungus on the mirror and screen. I shipped it off to Bill Maxwell for a CLA and new Maxwell screen. After waiting a month, I bought an E-Bay Rolleicord. It had fungus on the screen, fungus on the mirror, and fungus in the lenses. I shipped that off to Essex Camera for a CLA. I picked up another 3.5E Xenotar on E-Bay. Like the others, it needed a cleaning. Keep in mind that these cameras are nearly as old as I am. Relatively speaking, they look better that I do. I finally got my first 3.5E Xenotar back from Bill Maxwell and took it out for a shoot.

It is ironic that these are called reflex cameras. My 56-year-old reflexes are what make them a challenge to shoot. Although it didn’t bother me in my younger years, getting used to a mirror image that moves the opposite direction of the camera is like one’s first attempt to back a boat trailer into a garage. Then using the grid on the screen to frame the image has you swaying back and forth, tilting forward and backward, and from side to side. Unless your subject is very patient or a vegetable of some kind, there are no real snapshots here. No doubt about it. You need to take slow aim at an immovable object with all of the time in the world if you want usable frames on your first roll.

Why bother? Well, despite their unwieldiness, they are capable of some astonishingly good results. With the right film, developer, and technique, I have seen good Rolleiflex photographers make a mundane subject like a dandelion look like something that anyone would want on his living room wall. They also have the mystique of Leica and Zeiss cameras: excellent craftsmanship, sturdy build, phenomenal optics, and a design that is good enough to transcend decades of production with only very minor improvements. When you buy a digital camera today, it may be out of production by the time you first press the shutter release. The many thousands of durable Rolleiflexes still operational ensure that there will always be parts available somewhere. The only thing we have too few of are master repair technicians such as Harry Fleenor who can get a neglected E-Bay Rolleiflex back into excellent shooting condition. He just received my second 3.5E Xenotar for a CLA and new Maxwell screen. He is backed up enough that I won’t see the camera again for about three months. Not to worry. I still have a couple of good specimens to use in the meantime. I hope to try some black and white films in my other 3.5E Xenotar, develop them in 777 or PMK Pyro, and display the results here.

Saturday, July 15, 2006

Agfa APX 400 in PMK Pyro

My recent discovery of PMK Pyro developer has turned my way of thinking about film and developer 180o . In years past, I might try a different film, find the results pleasing, buy a brick of it, and then look for a developer that seemed to work well with it. Ultimately that developer would be HC110, D-76, or XTOL. Why does every film seem to develop well in these developers? One hypothesis is that film manufacturers deliberately design their films to work well in D-76 et al. because of the immense popularity of these developers. Other developers seem to work well on some films but not others. Rodinal comes to mind as a developer that works very well on slower, fine-grained films but doesn’t fare as well with faster films due to the obvious grain. PMK Pyro doesn’t seem to follow these rules. The most common way to gauge the suitability of PMK Pyro for a film is by characterizing the film’s tendency to pick up stain from the developer. Part of the appeal of pyro developer is that it stains the exposed areas (a rather bilious green), the degree of staining being proportional to the amount of exposed silver halide in the emulsion. The green stain seems to suppress the granular appears of some films. Some films pick up the stain well and others don’t. Even more specifically, some 120 films pick up the stain well but their 35mm counterparts don’t, and vice versa. Where this leaves me is with a developer I like very much and the task of finding films that develops well with it. My initial tests seemed to indicate that PMK Pyro's staining action masks grain very well. Well, that isn’t always the case.

This past week, I shot a roll of Agfa APX 400 and developed it in PMK Pyro. I didn’t have much to go on regarding the exposure index or developing times to use. The Massive Dev Chart has no data for APX 400 developed in PMK Pyro. That means one of two things...either nobody has ever tried this combination, or the combination is not recommended. The latter is certainly true.

PMK Pyro does an excellent job on medium speed films, particularly Ilford FP4+. With APX 400, the negatives were quite thin. There are four ways to address thin (poorly stained) negatives.

  • Reduce the E.I. and over-expose the film.
  • Over-develop the film a bit by increasing the developing time (most of my PMK times are around 10-13 minutes, but some films require 18 minutes) and/or the temperature of the developer.
  • Decrease the dilution of the PMK Pyro from 1+2+100 to 1+2+50.
  • Use another film.

I used the nominal ISO of 400 and the nominal dilution of 1+2+100. To ensure that there was enough developer in the tank, I used 600 ml developer for one roll of 35mm film (twice what I usually use). It wasn’t enough to increase staining to an acceptable level.

What is the result of scanning underexposed/underdeveloped APX in PMK Pyro? Too much grain. The kind of grain one would expect if shooting pushed TRI-X in a Minox subminiature spy camera.

This image is of my neighbor’s dog (an extremely intelligent and faithful beast who sat on my porch with me during the 3 days after Katrina left town). The lighting was fairly good, and this frame is the best of the lot.

The next image is of a nail boutique/pager store on Magazine Street. At low magnification, the grain seems acceptable. An enlarged area of the negative shows the gritty result of using this combination.

Will I try other developing times for APX 400 in PMK Pyro? No. I might revisit the two together again if I ever decide to produce a photo essay of coal miners. APX 400 does well in other developers, so I’ll give it a try next in 777 or Divided D-76. There are other films that I would like to try in PMK Pyro. To date, the films that work best with it have been Ilford FP4+ (ISO 125) and Fomapan 200 Creative (ISO 200). I would like to find a good 400 ISO film for use with PMK Pyro. There are a lot out there, and I’ve just eliminated one of them.

Wednesday, July 12, 2006

The Mind's Eye - Writings on Photography and Photographers

Finding a copy of Henri Cartier-Bresson’s The Decisive Moment is easy now that the Internet does the searching for you. Paying for it once you have found it is less easy. Private sellers through Amazon.com currently have three copies for sale, the cheapest of which is $950. A more collectible specimen is $2,475. I really would like to read what HCB has to say, but I could buy a mint Rolleiflex Planar 2.8 for $2,475.

The recent DVD The Impassioned Eye (reviewed earlier) gives the view some insights into the master photographer’s way of thinking and way of viewing the world. The Mind’s Eye ($20 list, $13 street) does some of the same, with a bit more to say than the DVD. It is a small hardcover of just over 100 pages, 1.5-spaced, with rather big margins and quite of bit of white space. Don’t take a long train trip with just it to read. That said, it is a relatively inexpensive way to read some writings excerpted from other HCB books as well as some of his essays on photography and travel.

I won’t go on and on here about the book for fear of over-hyping it. If you are a devotee of Henri Cartier-Bresson, I think you’ll find the book worth the cost of a lunch. Though he was a very gifted photographer and artist, he was reticent. When you can find his writings inexpensively, get them. In thirty years, maybe you can sell it for $2,475.

Sunday, July 09, 2006

Ilford Delta 3200 in PMK Pyro

It is not enough for a film and developer combination to be good, or even excellent. It has to fill a niche, a need. If one already has that niche filled, it has to be better in some way (add a new dimension, be cheaper, be more readily available, etc.). I know some street photographers who use TRI-X with D-76 or HC110 and nothing else. The combination they settled on works as good as they want it to work. Why go elsewhere unless you are attempting to displace what already fills your needs?

With D-76, XTOL, and HC110 so popular, I was surprised to find that PMK Pyro gave me such good results. It is an old style developer that has a reputation of being loved by a few and hated by everyone else. I have pontificated on the virtues of PMK Pyro elsewhere. Here, I just need to point out that PMK Pyro works very well with some slow films, some medium-speed films, some fast films, and some very fast films, making it an excellent all-around developer for me as long as I use the films that react well to it.

I have always avoided very fast films because I don’t like coarse grain and because I don’t like shooting at f/22 and 1/1000 outdoors. But when I read that PMK Pyro worked well with Ilford Delta 3200 I thought I might as well give it a try, at least in subdued light. Maybe it could fill a niche. To combat the inevitable grain, I decided to go with medium format for this test.

The recommended E.I. of Delta 3200 in PMK Pyro is 1600. Well, I just lost one stop of film speed. Developing films with pyro usually takes about 12 minutes at 68oF. With Delta 3200, the recommended time on the Massive Dev Chart is a whopping 18 minutes at 75oF. Developing the film that long and at that temperature suggests to me that a more appropriate exposure index might be 800, not 1600.

I loaded a roll of Delta 3200 in a Mamiya 7II and set the ISO at 1600. I was more interested in how it performed under subdued light, so I took it to breakfast last week. The setting was a very brightly-lit café with large picture windows. With the Mamiya 80/4 lens wide open, I had to shoot at 1/60.

Ernie Fitzgerald is a septuagenarian ex-marine who still runs 3 miles every morning before dawn. In the diffuse light of the café and with the lens wide open, the results were actually sharper than I expected. The grain was well controlled by the staining action of the pyro.

Now, does this film (in medium format) and developer fill a niche? Not really, at least not with the equipment I currently use and the latitude where I do most of my shooting. The problem is that, even at the slower E.I. of 1600, the film is too fast to use outdoors. I couldn’t get an outdoor shot with the Mamiya at anything other than f/22 and 1/500 unless I went into the shade. I’m just too close to the equator to use Delta 3200 outdoors under most conditions. Indoors, I was at the other extreme. Even with a relatively bright indoor environment, I was shooting wide open at 1/60. It is too fast to use outdoors, and too slow to use indoors. If I had been shooting 35mm and a fast lens, it would have been good indoors. But then there’s that grain with small negatives. Before I write off Ilford Delta 3200, I’m going to try some 35mm indoors with a 50/1.4 Summilux. If the pyro stain can reduce the appearance of grain, then Delta 3200 in PMK Pyro would be filling a niche. That said, if I lived in Sweden and wanted to shoot medium format outdoors, this might be a fabulous film/developer combination.

Saturday, July 08, 2006

Rollei Pan 25 Film

Since getting into photography nearly 40 years ago, I have seen slower-speed films slowly disappear from the catalogs. In the 1960’s, Kodak Panatomic-X was a staple in my film bag. By the time I entered graduate school in the 1970’s, there seemed to be slow black and white films from virtually every major film manufacturer here and abroad. I particularly liked the specialty B&W films that had virtually NO grain. Kodak had a Photomicrography B&W film (later named Kodak Technical Pan film), and I really liked an offbeat H&W Control Pan film developed in Ethol TEC. True, both of these films required a steady hand or tripod, but the results really put a person’s lens quality to the test. Both are gone now.
Last year, we seemed to be down to one readily-available slow B&W film, namely, Ilford Pan F+. The old Adox KB14 (ISO 25) has been re-released under different names, but that was not an easy film to use. I found several reasons to steer away from it. It was too tightly-coiled to easily feed into a reel, the wet emulsion seemed overly soft and easily damaged, and the film base was dark purple.

In recent years, we have seen the demise of the slow Kodak Panatomic-X and more recently, Agfa APX 25. Ilford Pan F + (ISO 50) is so close grain-wise to the recently released Fujifilm Acros 100, I usually use the latter to get that additional f/stop of speed. Specialty films that can be developed for full tonal scale (such as Bluefire Police film) are still available for extremely fine grain and high resolution, but finding a readily-available suitable developer for them is difficult.

Enter Rollei Pan 25, a newly released film that nobody really seems to know very well. I have read that it is a relabeled specialty film, but others have said that it is an entirely new film. I tend to believe the former rather than the latter, especially after reading this on the Massive Dev Chart.

Rollei films are the same as Maco films. The published times are identical (subject to revision), so simply refer to the relevant Maco chart for the development information you require. We are awaiting further clarification on this product line, but the type/speed of the Maco films should indicate which Rollei film is the equivalent product. More information will be published as it becomes available. (www.digitaltruth.com)

Whatever it is, the packaging is a bit bizarre. When you buy the film, it arrives in a fancy varnished wooden box that reminds me of a chess set (only smaller). This film is expensive ($56.90 for 10 rolls), and my first thought was that they could cut a little on the film price by not packaging it in a gift box. Inside the box are ten rolls of film in black canisters. Things are not quite as fancy inside the box. The labels on the canisters have print with jaggy edges reminiscent of the output of my first Epson dot matrix printer. But I cannot complain. Most canisters have no label, so the funky one here is a plus. On the film cassette is pretty much the same label as on the canister. There is no DX code on the cassette, so you'll have to set the camera's ISO manually.

So much for the idiosyncratic packaging. How good is the film? Slow black and white films are notorious for narrow latitude, which is one reason why they fell out of favor. I don’t know many people (me included) who do much routine bracketing these days. I don’t have many subjects that will sit still that long. But to be fair to the film, I committed myself to trying to make the exposures as accurate as possible. And I decided to use the Cosina Voigtländer 50/3.5 Heliar lens, a reputably great performer. And to tame the high contrast I expected to get (the midday sun was very bright with no clouds), I went with D-23 developer. I had to estimate the developing times. The Massive Dev chart had no development times for Rollei Pan 25 or Maco 25. I had read that Rollei Pan 25 had an antihalation backing that had to be removed, so I used a 1-minute water presoak
The results were good but not spectacular. A full frame, unadulterated scan shows decent sharpness and tonal scale when printed. An unadulterated enlargement of a small portion from the center of the picture retains good detail with some apparent grain. I’m not sure that D-23 was the best developer to use on this film. PMK Pyro may be a better choice in that it tends to minimize the appearance of grain. Still, I don’t think I would have any trouble enlarging something to 16x20.


The question that faces me is would I want to make Rollei Pan 25 a regular item in my bag? Twenty years ago (given the choices of slow film available), I would probably say no. It is just too slow. Today? Probably no. If I want very fine grain, I would opt for one of the chromogenic 400 ISO black and white films. Although I would have to wait a week to get the film back from the lab, Kodak BW400CN (1) is cheaper, (2) is faster by a whopping four f-stops, (3) has much nicer scale, and (4) allows me to use digital ICE technology to remove dust spots.

Wednesday, July 05, 2006

The Impassioned Eye (2003)

“You really don’t have to know too much in order to be a photographer. What you need to do is simply to look.” Magnum Photographer Elliot Erwitt

The quote does not come from Henri Cartier Bresson, the subject of this documentary. It is just one of many sound bites made by the participants in this 2003 film by director Heinz Bütler “The Impassioned Eye”. The title is an appropriate one. The recurring theme here is that photographers must use their eyes to recognize geometry, texture, shape, and patterns. Not that we didn’t know this, but it does serve to focus our attention on just how important careful observation and a trained eye are to the photographer.

Over the past five years or so, I had gotten the impression that Henri Cartier Bresson was no longer interested in photography, that he didn’t like to talk about photography, and that he didn’t like interviews, especially about photography. He does mention in the film that he found drawing to have more possibilities. But after seeing one photograph taken in 1926 followed by another taken in 1966, it is entirely possible that, after at least four decades of photography, he simply tired of the medium. This film does not contradict my impressions. At no time in the 70 minutes does he appear to be interviewed. Nor is there an interviewer’s voice or a question asked. Cartier Bresson smiles and displays photograph after photograph, speaking to the camera in snippets (in French, translated by voiceover). There is no dialogue, no long discourse. The format reminds me of the book “Hemingway on Writing”, which is little more than isolated statements by Hemingway (from letters and fiction) about the writing craft. Perhaps Hemingway’s single most important advice to writers was

“Do not worry. You have always written before and you will write now. All you have to do is write one true sentence. Write the truest sentence that you know.” (The Moveable Feast, 1964)
Cartier Bresson and other artists expound similar truisms throughout the film, and most contain a simple idea that should become second nature to the photographer. They hold more credibility here because of their source. Cartier Bresson makes point after point about photography, none too deep or too long, and none breaking any new ground. But worth listening to. I don’t believe I ever heard him say the words “The decisive moment”, but he does implore the listener at one point to “Seize the moment.”

At my first sitting, I came away from the film assuming that the parts with HCB were filmed in one or two afternoons, totally unrehearsed and unscripted. By the third sitting, I realized that he was wearing half a dozen different sets of clothes, and that this may have been filmed over a considerably longer time. It also becomes apparent that snippets were rearranged to make film flow better. The filming was obviously done near the end of HCB’s life. He appears to be in his mid-nineties but still spry. Oddly, Arthur Miller (who was only seven years younger than Cartier Bresson) appears to be closer to 65 in this film. The photographer died a year after the film was produced, the playwright a year later.

Unlike James Nachtwey's War Photographer, there are no depressing scenes of famine with emotionally wrenching music by Arvo Pärt. Rather, the film is upbeat with some lively Bach keyboard pieces. During the latter part of the film, piano music by Ravel creates a slightly more somber mood (all piano works are played by Angela Hewitt, one of my favorites). One interesting observation made was that Cartier Bresson’s impression of America was that of planned obsolescence, a country that found much of itself to be disposable. And his photographs of America reflect that sort of decadence.

Who should buy this DVD? Any photographer who is interested in this sort of non-studio photography. Any photographer who is not convinced that he/she knows all there is to know about photography. The statements are not as profound as they are logical and practical. Like an HCB book of photographs, the film is to be enjoyed over and over.

Saturday, July 01, 2006

Two-Bath Developers for Black and White Film

Divided or two-bath developers are not a new innovation, and I’m surprised that they are not more popular today. They are less likely to over-develop or under-develop film, they work well under less than ideal conditions, and they tend to be less polluting than conventional developers (for reasons I’ll explain later). Pollution of ground water is less of a concern now that ascorbic acid developers have gained popularity. Still, there are other advantages divided developers have over the more popular single-solution developers.

What is a two-bath developer? Let’s take the most common example, that of Divided D-76. Plain D-76 (single solution) consists of a mixture of developing agents (metol and hydroquinone), sodium sulfite, and an alkaline activator or accelerator (usually borax). Mix the four together in water and you have an active developer. If you divide these chemicals into two solutions, one with metol, hydroquinone, and sulfite in water and one with borax in water, neither solution can do much to film by itself. Bath A has inactive developers and sulfite, and Bath B has an activator with nothing to activate. Thus, immersing film in either bath by itself will not accomplish much.

To develop the film, one must first immerse the exposed film in Bath A (inactive developers + sulfite) and let the inactive solution saturate the gelatin emulsion. Time and temperature are not critical, as this is a physical reaction (simple diffusion into the emulsion), not a chemical reaction. Three minutes is usually all it takes to saturate the film’s emulsion. Now Bath A is decanted back into the stock Bath A bottle. It is essentially unchanged and doesn’t have to be replenished. No chemical reaction occurred in the tank. There is just a bit less of Bath A's volume returned to the bottle. Next, without rinsing the film, Bath B is poured into the developing tank. This alkaline solution, the accelerator, soaks into the film’s emulsion and activates the developing agents. Development takes place in another 3 minutes or so. Bath B is then discarded and the film is fixed and washed as usual.

Having to use two different solutions during development is one more step in the process, so it is a bit more of a hassle. What are the benefits of using a divided developer?

  • Less developer is “used” and less developer goes down the drain. By allowing a very small amount of the developing agent soak into the emulsion, most of Bath A is returned to the stock bottle. Only the few milliliters that soaked into the emulsion enter the sewer system. All of the borax solution is discarded after use, but it is not considered to be toxic (it is the same borax that has been sold as a clothes washing aid for decades).
  • Developing many rolls of film leaves the developing solution unaffected. Since no chemical reaction takes place when soaking the film in Bath A, no replenishment is necessary and no adjustment of developing time is necessary due to breakdown of the developer.
  • Developing temperatures are not critical. Living in the subtropics, trying to keep one's solutions at the optimum 68oF is daunting. Doing everything at a much more reasonable 75oF (the temperature of everything in my house) is far simpler.
  • Developing times are not critical. By having the developing agent exhaust itself during development, the times and temperatures are less critical than those involving a large surplus of active developer in the tank.
  • No blown highlights. It is nearly impossible to overdevelop the film. Having the small volume of developer exhaust itself in areas of high film exposure is a safeguard against blown highlights.
  • Underdevelopment is nearly impossible. Developer remains active longer in the underexposed areas because the developing agents are not depleted quickly here.
  • You can develop TRI-X, PLUS-X, APX 400, and Pan F+ in the same tank. With all films requiring the same non-critical times and temperatures, you can simultaneously develop a mixed bag of films together in one developing tank.
  • It is dirt cheap. If you decide to use Divided D-76, you can easily mix your own fresh reagents yourself from four stock dry chemicals (Photographer's Formulary also uses a small amount of potassium bromide as a restrainer). I have found that Bath B is a pretty much a saturated solution of borax. When I have warmed up the distilled water to get all of the carefully-measured borax to dissolve completely, crystals rematerialize in the bottom of the bottle when it returns to room temperature. That means the solution is saturated (i.e., you cannot get any more of the borax to dissolve). From a practical standpoint, you just have to keep enough borax in the bottom of the bottle to keep that solution saturated. I use 350ml of solution B when developing a roll of 35mm film. To restore my stock solution B, I just pour 350 ml of water into the Bath B bottle, shake it up good, and let it sit. When the borax crystals in the bottom layer start getting too shallow, I add more borax with a spoon. The Film Developing Cookbook (Anchell and Troop, 1998) states that Bath B can be used for up to 10 rolls of film. To keep things consistent, I discard mine after the first use.

What is the downside of using a divided developer? I suppose that it is, like most common developers, a collection of compromises. What works very well for TRI-X may not bring out the best in Acros. And I don’t really trust the ISO ratings of most films these days. When the Massive Development Chart states that Ilford HP5+ (ISO 400) requires 10 minutes of development in a certain developer but that Kodak TRI-X (ISO 400) requires only 6.5 minutes of development in that same developer, I start to think that they shouldn’t really both be rated at ISO 400. If I were to decide that all of my films would hereafter be developed only in Divided D-76, I would probably shoot a few test rolls of each film and adjust the exposure index for optimum negative density with my chosen developing times.

Divided developers are not ideal for low contrast images. Their strength is primarily in higher contrast subjects like one might encounter in street photography or photojournalism (before it became digital).

There are several recipes for Two-Bath D-76 on the web and in The Film Developing Cookbook. Ansel Adams reportedly used a divided D-23 developer in his work. This appears not to be a conventional two-bath developer, but rather a typical D-23 developer with a second alkaline bath. Some photographers have expressed concern over film swelling in the second bath. This can be reduced by using a second bath with alkaline accelerator plus sodium sulfite. Vestal’s Divided D-76 uses 50g/l sodium sulfite in each of the two baths.

The M Strap

Discussions on photography forums regularly have threads on the best camera bag, the best rangefinder camera bag, and (less frequently) the best camera strap. While none of these threads are headline news, people who have more than one camera (particularly vintage cameras that no longer have the original strap) soon find themselves with multiple kinds of straps and a favorite or two among them. I have decided that three kinds are absolutely not my favorites.
  • Wide straps with “Nikon” written all over them. Wide straps with company logos were more popular in the 1970’s, but they reminded me of guitar straps with “Fender” written all over them from the 1960’s. A poor fashion statement regardless of attire. And it is hard to blend in the crowd with a “Hey, I have a Nikon camera” strap.
  • Elastic camera straps. These are narrow nylon camera straps with a large, elastic (black sponge rubber) shoulder piece. The shoulder piece can stretch, acting like a shock absorber. I suppose these are more comfortable to use if you are carrying a cinder block on a strap, but not really necessary or desirable for a small camera.
  • Shoulder straps with two big plastic quick-release clasps. These must be for people who want to release the camera from the strap and leave the remainder of the strap sitting on their shoulder or around their neck. I want a strap to securely attach me to the camera, so two opportunities for a quick release don’t give me much security.

To be honest, I don’t really like any over the shoulder or neck camera straps. If I wear it across my chest (diagonally from left to right), the camera is secure but not available for use (and I look like a nerd). If I wear it around my neck, my camera bounces on my ample stomach and I look like a tourist. If I wear it over one shoulder, it repeatedly slides off my shoulder if I reach down even a small distance. Worse yet, two of my cameras have been seriously damaged (and many more banged around but not badly damaged) due to a strap slipping or catching on something, or the camera swinging against a hard object. My Nikon EL2 dropped about 4 feet from the seat of a Suburban to a concrete curb when my camera strap snagged when someone else was exiting the vehicle. My Canon VT Deluxe was flung about 6 feet onto the pavement (destroying the lens) when the camera strap tangled in my seat belt and gear shift while I was exiting my SUV. Clearly, I have some issues with straps.
I have tried to emulate photographer friend Sonny Carter's practice of carrying a camera just about everywhere. Most of my photography is what is loosely defined as Street Photography (photographs of people and things unplanned in natural surroundings), and most of it is in New Orleans, a city who existence relies on tourists. Wear a camera with a strap around your neck and you look just a tourist, a most muggable kind of victim. So I recently started using something far less conspicuous, the M Strap. This is not a shoulder strap. It is a small wrist strap that attaches to one side of the camera.
These are not produced by Leica, and are perhaps the least advertised camera straps in existence. Seth Levine, the producer of the M Classics Bag (the subject of a later blog entry), produces and distributes these from his austere web site.
The wrist strap seen on his home page is attached to the right side of a camera. This allows one to walk with the camera unobtrusively but securely in the hand until a decisive moment nears. I used one of his straps with a Bessa R for several weeks and found it a big improvement over a shoulder strap. My only concern was that I had to adjust the strap on my wrist from time to time in order to advance the film and/or trip the shutter. Last week, I decided to switch the strap to the left side of the camera, and that is where it will stay.

Yes, I know that my thumb is over the viewfinder window. This is the only way I could photograph myself holding the camera in my left hand.
The tension on the strap attached to my left wrist steadies the camera, leaving my fingers free to focus and my entire left hand free to advance the film and trip the shutter.
Seth Levine's operation appears to be a one-man enterprise, like my other favorite web-based operations CameraQuest and Frugal Photographer. Seth is an amiable chap who is conscientious with his customers. His contact information is here. I'm in no way affiliated with Seth or his store. I think his products deserve a bit more publicity as they have been most useful to me.